
The drawers were constructed in period-correct fashion with through dovetails front and back. The central veneers on the drawer fronts are the more figured stuff from the ends of the leaves of quarter cut veneer I used for the stripy crossbanding elsewhere on the chest and stand. These panels are surrounded by randomly laid featherbanding which, in turn, is bordered by more of the quarter-cut crossbanding (fig.1).
 Fig. 1. The three veneer elements create a patchwork quilt effect.
Drawer stops were rubbed onto the inner back edges of the carcases before I nailed the backboards on and boarded over the top of the stand.
 Fig. 2. The chest-on-stand in-the-white…
 Fig. 3. … and finished.
The brasses on the original chest-on-stand are later additions (as determined by at least one set of scars and plugged pommel holes), though stylistically, they are typical of the period (1700). However, as this chest-on-stand hails from the provinces and, as discussed in earlier posts in this series, was made by a cabinetmaker not entirely conversant with the latest fashions and techniques, I tend to believe the original brasses might too, have been a little behind the times.
The solid, un-pierced escutcheons and fish-tail drops (fig. 4) were fashionable between 1670 and – at the very latest – 1700, so they fit the overall picture nicely.
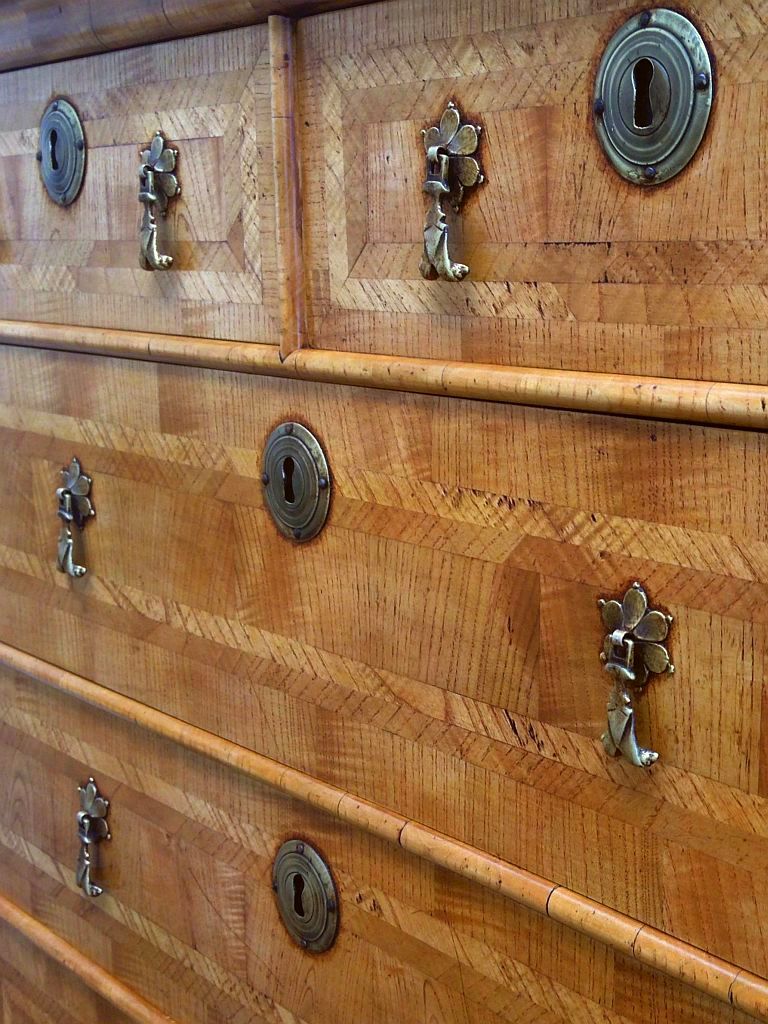 Fig. 4. The brasses – waning on fashionability.
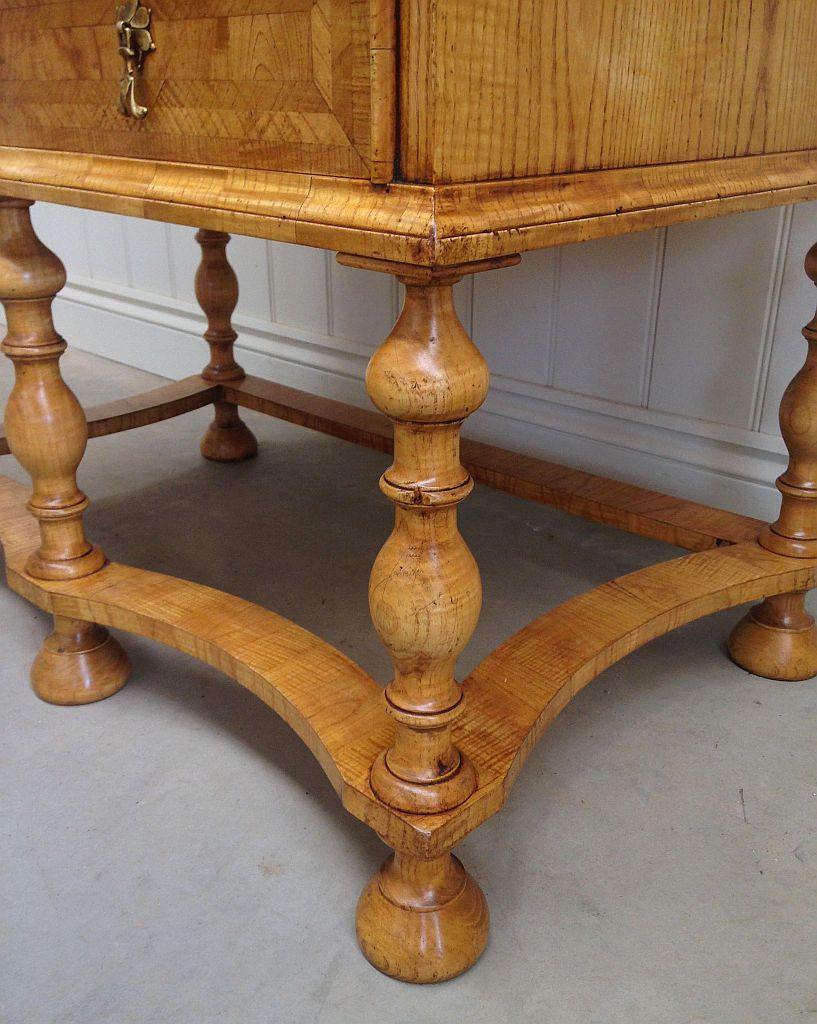 Fig. 5. Legs and stretcher.
The drops and escutcheons are available from Optimum Brasses.
Jack Plane

That is really nice Jack, well done!
LikeLike
You are so talented Jack!
LikeLike
Nice finish. Shellac and glazes?
LikeLike
Close enough.
JP
LikeLike
Another fine job Jack. Really nice.
LikeLike
This piece is awesome,…. as usual. Could you post some of the overall dimensions? and could you talk a little about the coloring/finishing process that you used on this chest.
We’re all jealous.
LikeLike
The COC is quite diminutive at 51-3/4″ high, 36-1/2″ wide and 23″ deep. The finish is a light khaki stain coated with spirit varnish, then washed with pigmented size and further varnished before being waxed.
JP
LikeLike
I’m always impressed with how carefully observant and honest your work is. It’s highly admirable.
LikeLike
No criticism of your workmanship, but I was wondering why your topmost full width drawer is deeper than the ones below? Doesn’t that go against convention? Don’t get mad, I still want to buy you book, when it is finished!
LikeLike
I would refer you to Part One.
JP
LikeLike
You are “the man”! Oil-glaze-oil-wax?
LikeLike
I am in the company of many here.
Spirit varnish, size wash and wax on this one.
JP
LikeLiked by 1 person
Very nice. A history lessen with each piece that you make. There were some very talented people in the past design and construction wise. You are right in there with them.
Jim
LikeLike
Top job on the colour Jack, and nice shading round the brasses.
LikeLike
Truly stunning work!
LikeLike
The drawer stops are in the back? I didn’t know that about this period, though I guess it makes sense. Is one likely to see protruding drawers on originals because of that practice? Also, because you rubbed the drawer stops (and I do know of that practice) does one often see missing stops? It seems reasonable that many of them would have sheared off.
LikeLike
Early drawers ran on their bottoms directly on the dustboards, so the only place for stops was at the rear, on the carcase ends (between the drawer backs and the carcase backboards). As you surmise, drawers did occasionally protrude slightly due to carcase shrinkage.
It wasn’t until drawer bottoms were raised up into rebates or grooves in the drawer fronts and runners were added beneath the bottoms (circa 1700 – though country practices lagged quite significantly) that it was possible to attach stops at the front of the dustboards, immediately behind the drawer fronts.
Drawer stops at the rear of carcases typically had greater footprints than front-mounted stops, but some still failed due to the glue drying out. With better made case furniture, rear and front stops were nailed as well as glued.
JP
LikeLike
For the top, do you apply veener to a solid wood piece? Thank you,
LikeLike
Yes, see Part Three.
JP
LikeLike